Stablecoin checkout for your online store
Create the order from your backend, send the customer to the Neropay checkout, and read the order back when they return. Your cart keeps its own order numbers the whole way through.


Three calls, and you are done
There is no SDK to adopt and nothing of ours running on your side. The checkout is a URL.
- 01
Create the order when the cart is confirmed
POST /v2/merchant/fiat/order with your own order_no, the amount in rupiah, and the line items. Your API key travels in an api-key header and never reaches the browser.
- 02
Send the customer to the URL you get back
The response carries url, key and expired_at. Redirect to it, or open it in your own webview. Token choice, wallet, QR, chain warnings and the countdown are all handled there.
- 03
Get told when it lands, or read it back
Neropay POSTs a signed transaction.success webhook to the notification_url you set. If you would rather pull, POST /v2/merchant/fiat/getOrder with merchant_id and order_no returns Created, Success, Expired or Invalid — the same four states the dashboard shows.
What your customer actually sees
They land on the Hashpay checkout with the amount already fixed. Everything about picking a token and a chain is handled there, not in your cart.
- The customer picks USDT or USDC and the network they want to pay on.
- The amount is fixed at the moment the order is created, not re-quoted at payment time.
- The page warns which token and which chain to send, because a transfer on the wrong chain cannot be returned.
- It polls the order while the customer is on it, so the receipt appears without anyone refreshing.
What goes over the wire
Two calls do the work — one to create the order, one to read it back. Token, wallet, one-time address and the exact amount are all handled inside the checkout URL you were handed.
POST /v2/merchant/fiat/order
api-key: <merchant api key>
Content-Type: application/json

{
  "merchant_id": "1",
  "order_no": "INV-24815",
  "amount": "1842500",
  "name": "Budi",
  "email": "budi@toko.id",
  "products": [
    { "name": "Kopi Gayo 250g", "price": 1842500, "quantity": 1 }
  ]
}{
"status_code": 201,
"message": "success",
"data": {
"url": "https://<checkout-host>?key=…",
"key": "<encrypted order key>",
"expired_at": 1730000900
}
}Redirect the customer to url. When the payment lands, Neropay POSTs a signed webhook to your notification_url — transaction.success, transaction.invalid (amount mismatch) or transaction.expired; POST /v2/merchant/fiat/getOrder still answers the order state if you prefer to poll.
Reconcile without leaving the dashboard
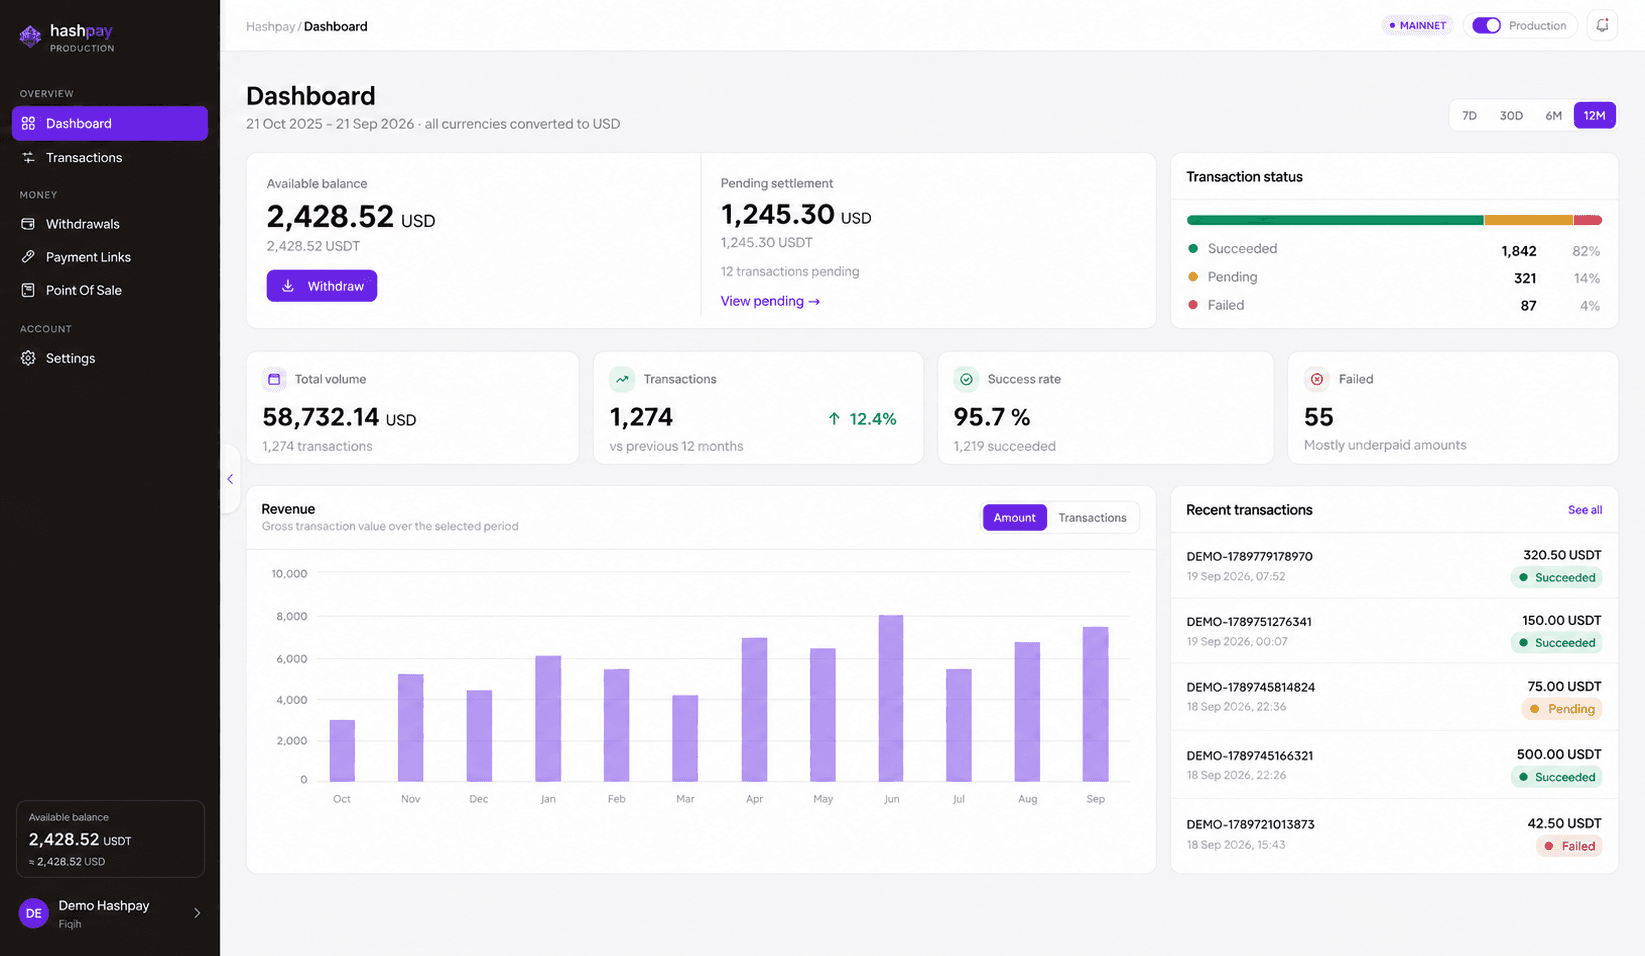
The orders your backend creates are the same orders the dashboard shows: balances, settlement still in flight, and a row per transaction with your order number on it.
- Available balance and pending settlement sit apart, so you can see what is still in flight.
- Every row keeps your order_no, the exact amount received and the status Neropay recorded.
- Payouts to a bank account or a crypto address are requested from the same screen, with the fee quoted before you confirm.
Built so your books still balance
The gap between a payment on chain and a row in your order table is where most crypto integrations fall apart.
Your order number survives
The order_no you send is the order_no you read back and the one printed on the customer's receipt. Nothing is renamed in between.
Line items travel with the order
products[] carries name, price and quantity, so the order in Neropay matches the cart the customer actually paid for.
Orders expire on their own
expired_at comes back with the order. Once it passes, the order becomes Expired and the checkout stops accepting payment. There is no cancel call to make.
Questions from integrators
The things that come up in the first week of an integration. If your question is not here, the API reference in the docs covers the rest.
A merchant_id, your own order_no and an amount in rupiah. On server-to-server calls your api-key travels in the api-key header; the dashboard uses a separate merchant session token instead.
Before you go live
Testnet is a first-class mode, not an afterthought. Spend an afternoon there and production holds no surprises.
- 01
Build against testnet
Sandbox has its own endpoints and its own schema. Nothing you do there can touch a production balance.
- 02
Fund yourself from the faucet
Mint test USDT, USDC and the gas to move them, then pay your own order the way a customer would.
- 03
Walk all four states
Drive one order to Success, let one run to Expired, and send a wrong amount to see it recorded as Invalid before you trust the happy path.
Put a stablecoin checkout on your store
Create an account, take an API key, and run a full order in the sandbox before you point real customers at it.